BLIIoT PLC IoT Gateway BL110 Application 46--Adding Mitsubishi PLC to Ethernet Port
Adding Mitsubishi PLC to Ethernet Port
Supports acquisition of Mitsubishi Q series (Q03UDE, Q04UDEH, Q06UDEH, Q10UDEH, Q13UDEH, Q20UDEH, Q26UDEH, Q002UD), L series (L02, L26-BT), FX5U series.
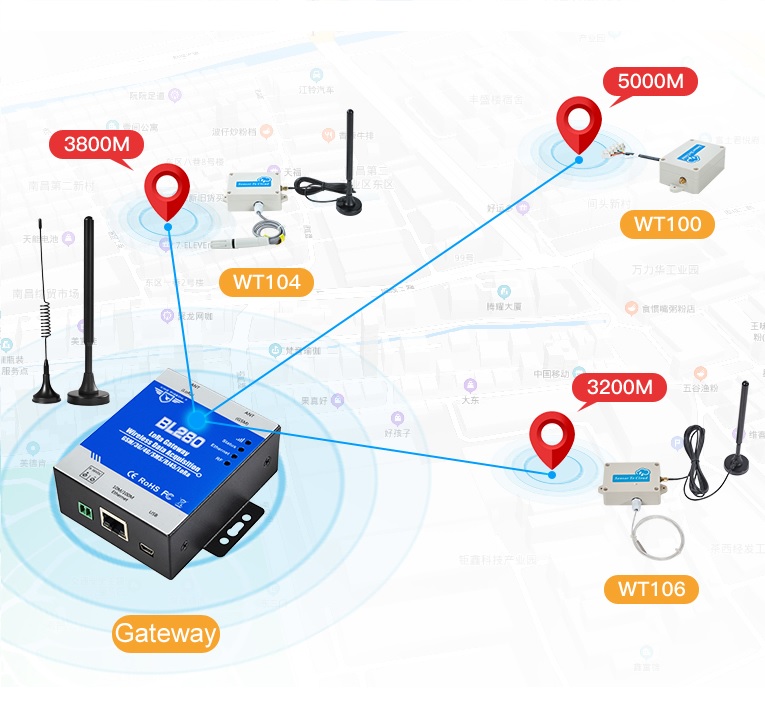
Both the WAN port and the LAN port can collect the Mitsubishi PLC, which can be directly connected to the Mitsubishi PLC or collected through the switch. The configuration principle of the WAN port and the LAN port is the same. WAN port or LAN port acquisition configuration parameters of Mitsubishi Q/L series or FX5U should be consistent with the settings on the PLC.
For example, the parameter setting on Q06UDEH of Q series, Q/L series should select MC protocol communication.
WAN Port Configuration
WAN port collect data from FX5U through the switch, and the switch is connected to the external network. The configuration of the WAN port is as follows:
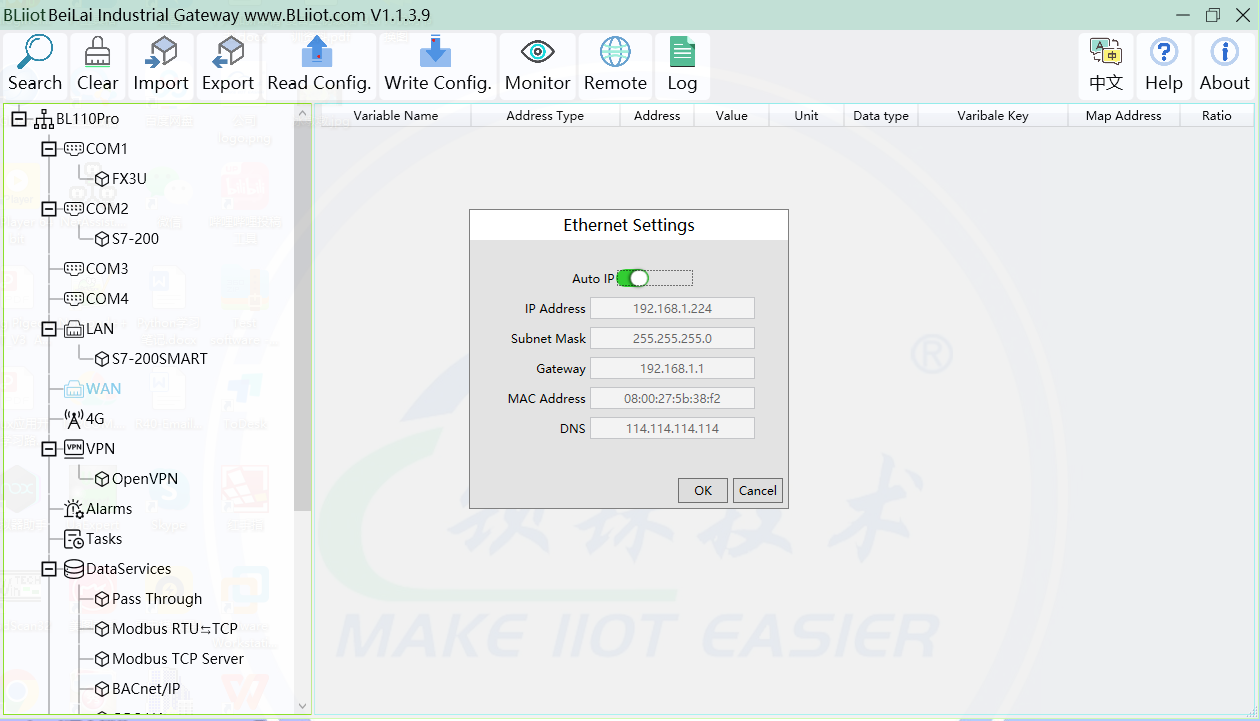
2.Auto IP: Whether the WAN port is enabled to obtain IP automatically, it is enabled by default, and can be set as required. In this example, the switch is connected to a router, and the router is enabled to automatically assign IP, so keep it enabled.
3.IP address: The gateway obtains the IP address from the router. If it is a designated IP, set it according to the requirements, the PLC and the gateway should be in the same local area network.
4.Subnet mask, the subnet mask of the WAN port gateway, if it is a designated IP, set it according to the requirements.
5.Gateway: The gateway address obtained from the router. If you specify an IP, set it according to your needs.
6.MAC address: the MAC address of the gateway.
7.DNS: The DNS obtained by the gateway from the route, if it is a specified IP, set it according to the requirements.
8.Click "OK".
Note: Click "Write Configuration" to restart the gateway automatically, and the configuration of the WAN port will not be changed until the restart.
Note: The IP address of the WAN port is the IP address that specifies which network segment the WAN port device is. If the IP address of the WAN port device is not the IP of the network segment set by the WAN, the WAN port cannot be collected. It is necessary to change the WAN port IP or change the WAN port according to the needs. The IP address of the port device. After changing the IP address of the gateway, it must be written into the configuration, and it will take effect after power off and restart.
Add Mitsubishi FX5U to WAN Port
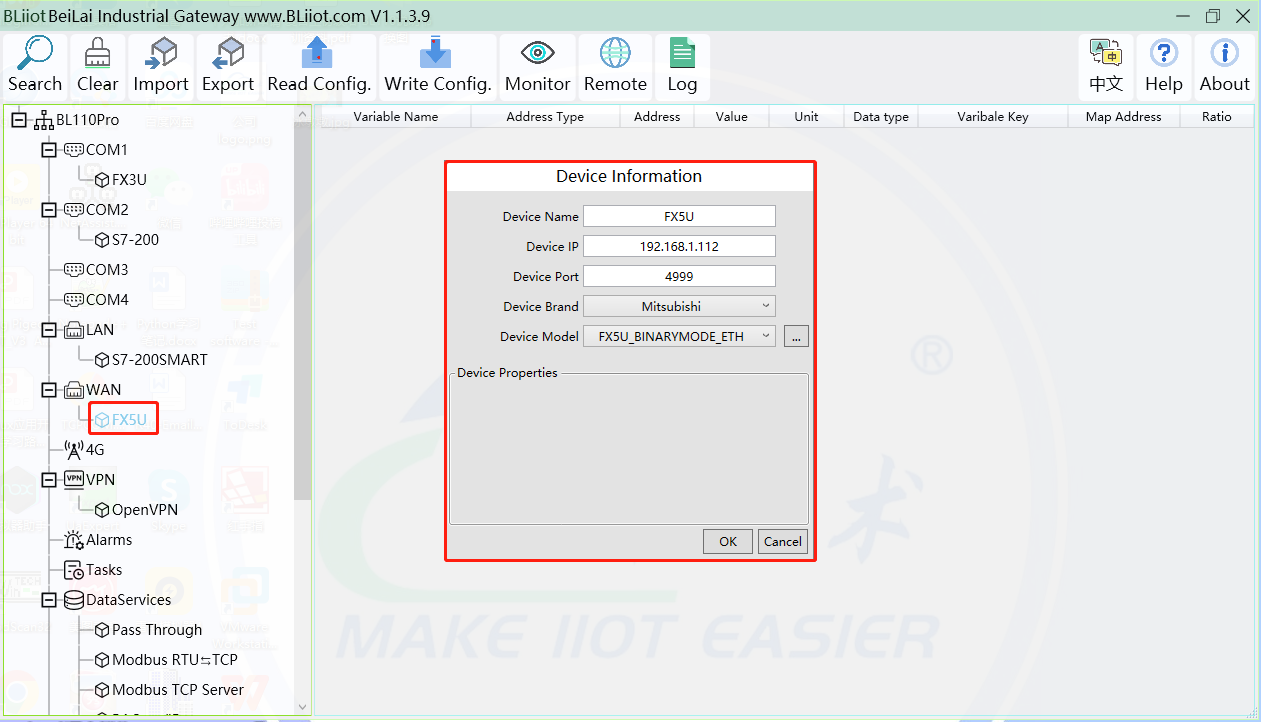
2.Device name: Name the device, for example, because Mitsubishi FX5U is an example, you can fill in FX5U.
3.Fill in the IP of the acquisition device, because the designated IP of FX5U is changed to: 192.168.1.112, so fill in 192.168.1.112 here. The IP is viewed on the Mitsubishi programming software. Fill in the IP of the PLC here. It should be noted that the IP of the PLC should be in the same network segment as the IP of the WAN port.
4.Device port : Fill in as required. The example is 4999 from the Mitsubishi programming software, so it is 4999.
5.Because it is collecting Mitsubishi FX5U, therefore, equipment brand: select Mitsubishi, equipment model: according to the communication data code setting on the Mitsubishi programming software is binary or ASCII code communication, binary select FX5U_BINARYMODE_ETH, ASCII code select FX5U_ASCIIMODE_ETH. The polling interval and communication timeout can be defaulted and filled in as required.
6.Click "OK" to add FX5U.
Note: After clicking OK, the added device will be displayed under the WAN port, as shown in the figure above. If you want to add multiple devices, repeat steps 1-6.
Note: Click "Write Configuration" and the gateway will restart automatically. After restarting, the FX5U added to the WAN port will be added successfully.
Add Mitsubishi FX5U Data Point
Configuration of data collected in register Y of FX5U is as follows:
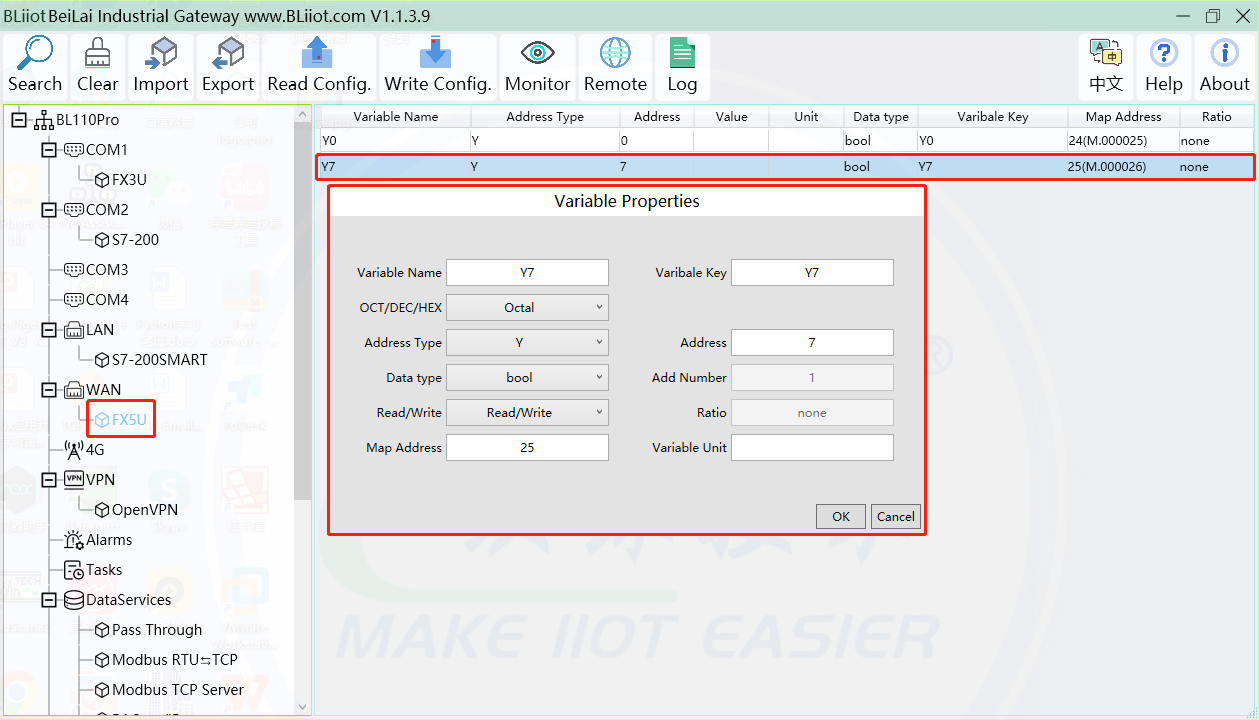
2.Variable name: Name the data point, collecting the data of "Y7", you can fill in: "Y7".
3.The identifier of the data point can be filled in arbitrarily. The identifier cannot be repeated, for example, the identifier of the collected "Y7" data point is filled in as "Y7".
4.Select the acquisition address fill in the input gateway in what data format according to the requirements. OCT/DEC/HEX are octal/decimal/hexadecimal respectively. Mitsubishi FX5U X and Y data points are octal, so choose octal. Select according to the needs, such as register W is hexadecimal, register D is decimal.
5.Address type: Selected according to the collected PLC data points. Collect the data of "Y7", select "Y".
6.Address: the register address of the collected data point, Collecting the data of "Y7", the address is: 7.
7.Data type: According to the type of register selected by PLC.
8.Add Number: If it is to collect continuous addresses, the same register can be collected multiple times.
9.Read/Write: choose from "read only", "read and write".
10.Ratio: Set the ratio to be multiplied or minified for uploading to cloud
11.Map address: Set address where datapoint will be saved in BL110. Modbus mapping address can be any from 0 to 2000 and it can't be repeated. The mapping address is "17" for collecting "Y7".
12.Variable unit: fill in arbitrarily according to requirements, or not fill in.
13.Click "OK".
Note: After clicking "OK", the data points will be displayed in the box as shown in the figure above. If you want to continue adding data points, right-click on the box and click "Add" to enter data point configuration box, repeat 1-13 Steps.
Note: Clicking "Write Configuration" will restart the gateway automatically, and the data points collected from FX5U will take effect only after restarting.